Next time you’re thinking of inviting friends over for a gathering, kick it up a few notches by hosting a beer tasting party. I guarantee you will have more fun than another normal get-together of casual conversation. This Thirsty in Seattle article has you covered.
Step 1 – Plan
Guests: 6 guests are ideal, but you can easily go up to 12. I wouldn’t go any higher.
Type of Beer: Let everyone choose what beer to bring. It’s much more fun and rewarding to let each guest do some research (can be as simple as asking for recommendations from their local bottle shop). You will be surprised how diverse of a lineup you have even with no coordination. Visit our Hall of Fame for inspiration. Another option is to focus on specific styles or a region. True beer geeks will likely want to have each guest bring a “whale”, a rare, hard-to-find beer.
Blind Tasting? Hell, yes! It’s the best way to go. It helps each guest better think about the flavors of the beer, without any preconceived notions about a style or brand clouding their judgment. For a blind tasting, each guest should bring their beer(s) in a brown paper lunch bag cinched near the top with tape.
Amount of Beer: Specify to your guests how much beer to bring. Plan on a 3-4 oz. taste per person.
6-8 guests: Have each guest bring 2 different bottles (Bottle size: 22 oz. bomber OR a larger 750ml bottle, the common size of Belgian beers). This will provide the group with a tasting of 12-16 different beers, depending on the number of guests. Example: Joe brings 1 bottle of Stone Ruination IPA and 1 bottle of La Fin du Monde
9-12 guests: Have each guest bring 2 bottles of the same beer (either 22 oz. bombers OR larger 750ml bottles, the common size of Belgian beers). This will provide the group with a tasting of 9-12 different beers, depending on the number of guests. Example: Joe brings 2 bottles of Stone Ruination IPA.
The reason I recommend a different approach for 9-12 guests is that the same quantity of beer per guest will be needed, but sampling 24 different varieties in one evening is far too many from both a time and palate perspective.
This is meant as a rough guide. You can tailor the amounts based on how much your crew drinks. Also, guests may need to adjust the amounts a bit if they are bringing a beer of a smaller size (such as a 12 oz. can of Ten Fidy or a 16 oz bottle of a German beer like Aventinus) or a larger size (such as a growler).
Food: Decide if you will provide all the food, or if you want to save money by having each guest bring something to share. I prefer to take care of all the food so the guests just need to select their beer(s), but either way works fine.
Plan on plenty of palate-cleansing foods, such as popcorn and crackers. Make sure to serve plenty of heavier food as well to help soak up those high gravity brews. Here’s a sample menu from my last beer-tasting event:
–Popcorn
–Crackers with several cheeses
–Hot pretzels with assorted dipping sauces (cheese, honey mustard, etc.)
–Fruit
–Blue cheese and bacon sliders
–Dessert
Step 2 – Invite Guests
Set the date and time and send out your e-vite invitations. Due to the nature of a beer tasting party, encourage guests to arrive on-time so you don’t have to start the tasting without them. Let the guests know what they should bring and tell them to place each beer in a brown paper lunch bag cinched near the top with tape.
Step 3– Prep for Party
Print Beer Tasting Scorecards: Print our beer tasting scorecards for each guest.
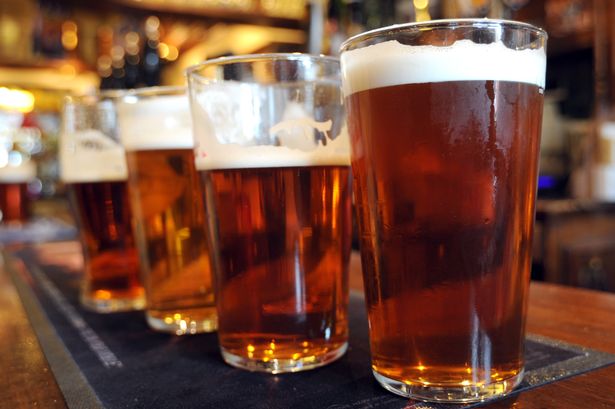
Glassware: Always use glass; never plastic. I like to use Belgian beer glasses or snifters, but large, red wine glasses work just fine. You will want nice, wide glasses to smell each beer.
Set up Table(s): I highly recommend having enough table and/or bar space to accommodate each guest. With all the food and beer, along with the tasting scorecards, this is not easily done on couches. Set each place at the table with a plate, napkin, utensils, beer glass, water glass, tasting scorecard and pen. Place a couple pitchers of water on the table so everyone can mix that in between beers. Include a bowl in case folks wish to rinse their glass between beers.
Determine Beer Order: The beers ideally should be tasted in order of alcohol content (high-hopped beers should also be a factor). Create some general “zones” on the counter or table with post-it notes. For example, you could have a zone for fruity/5% ABV; 6-8% ABV; 9+% ABV; IPAs; Russian Imperial Stouts/Barley Wines. This doesn’t need to be perfect science, and it won’t considering it is a blind tasting. You just want to make sure you’re not wrecking your palate with an Imperial IPA for the first beer.
Have each guest place their beer(s) in the appropriate zone when they arrive. Once all guests have arrived, mark each beer with a unique letter (A, B, C, etc.) and place them in the fridge. The higher alcohol beers, particularly Belgians, should be served around 55°F. When you get toward the latter half of your lineup, just pull the next beer out of the fridge whenever you open a new selection, so it has 20 minutes to warm.
Step 4 – Party and Have Fun!
Put on some music, open the first beer and get the party started! Have fun trying to describe each beer and guessing what it is. Record your notes on your tasting scorecard. Eat, drink some water. Repeat.
The Reveal
Wait until the end of the party to reveal the beers. I also highly recommend tallying everyone’s scores for each beer and averaging them (have a calculator on hand). It’s interesting to see the stack ranking of beers at the end of the night.
Only one question will be left at this point is – Who is going to host the next beer tasting party!

